Hosted PBX and VoIP FAQ
D&S Technologies Hosted Phone System user guide
MAKE A CALL
Pick up handset and dial the number
Touch Speakerphone and dial the number
(Hot keypad) Dial the number
(If you hit the send (#)key after any of the above, it will immediately go through)
(You do not have to dial the 1 before any call. If you do, it will still go through)
TRANSFER A CALL
Attended Transfer
While live on a call touch the transfer soft key in your display. Dial the extension number you want to transfer to and the send (#) key. Once the party picks up, hit transfer again and hang up.
Blind Transfer
While live on a call touch the transfer soft key in your display. Dial the extension number you want to transfer to and the send (#) key. Hit transfer again and hang up.
Offsite Transfer
While live on a call touch the transfer soft key in your display. Dial the outside number you want to transfer to and the send (#) key. Once the party picks up, hit transfer again and hang up.
Transfer Direct to VM
While live on a call touch the transfer soft key in your display. Dial the extension number you want to transfer to and the (*) key. Hit transfer again and hang up.
PUTTING A CALL ON HOLD
Personal Hold
While live on a call, touch the Hold softkey in your display. Hit Resume, or the flashing line button to get the call back (caller will hear music on hold)
System Hold or (Park)
While live on a call, touch one of the Park buttons (Park 1 or 2). This will put the call on system hold. The button will turn Red on all system phones. Simply touch the Park 1 (or 2) button to get the call back. (caller will hear music on hold)
EXTENSION TO EXTENSION CALL
Simply dial the person’s extension number. Or if using Hot keypad, dial extension number and send (#) key.
CONFERENCE
While live on a call, touch the Conference softkey in your display, dial the second number and after they pick up, touch the Conference softkey again.
D&S Hosted PBX>
Voice Mail user guide
Checking your voicemail from phone on site
1. Press the Messages Button, or dial *(star) and your ext.#
2. Enter your password + “#” (Default is your extension number and you will be prompted to change it)
3. Follow the prompts
MAIN MENU OPTIONS:
1. new/old messages ( *=rewind; #=fast fwd. )
2. change folders
3. advanced options
1. leave msg. for another user
*. return to main menu
0. mailbox options
1. record unavailable greeting
2. record busy greeting
3. record name
4. record temporary greeting
5. change password
*. return to main menu
*. help
#. exit
Mailbox Options after listening to a message:
3. advanced options
1. send reply
3. hear envelope (date/time, phone number of caller)
5. leave msg. for another user
*. return to main menu
5. repeat current msg.
6. play next msg.
7. delete
8. forward to another user
9. save to folder
0. new
1. old
2. work
3. family
4. friends
*. help
#. exit
Checking Voicemail Remotely ( For this option to work your calls must go directly to an auto attendant)
1. Call main number, at main auto attendant press “#” (Or option configured for Voice mail)
2. When you hear the prompt enter your box number
3. When you hear the prompt Enter your password + “#”
4. Follow the voice mail menu prompts
HPBX Basic Troubleshooting Tips
When troubleshooting problems try to get an accurate picture. Some starting questions to ask:
- Is it happening on all phones or just one or a few?
- Is it on incoming calls, outgoing calls, internal calls, or all?
- Can I dial internally between extensions?
- Can I retrieve voicemails?
- What happens if I plug the affected phone into a jack of a phone that is working?
- Does Auto attendant pick up on incoming calls? Should it be live answer?
- Call quality issues always track: Time of day, caller ID incoming or outgoing. This will help our support find that exact call
Basic Categories
- Phones are down
- Call quality issues
- Programming Issues
- Network and IT Hardware issues
Phones are down-Typical scenarios
- Display is dead
- Extension number is greyed out
- Display says Invalid Account
- Display says No Service
- Cannot get an IP Address (Hit the OK button)
Possible Fixes
- Reboot phone(s) Unplug phone cord and power supply if applicable. This is the cord that is plugged into the back of your phone into the INTERENT
- Check to see if you have Internet access. Bring up a web page on your computer. (Google, YouTube, etc.). If no internet, please call your internet provider.
- Reboot the modem of your internet provider (Spectrum, AT&T. etc.). Unplug the power cord for 30 seconds and plug back in.
Call Quality Issues – These are typically related to poor or insufficient Internet service and Router/Firewalls not properly programmed
- Echo
- Broken Speech/Dropped calls
- Sounds like in a tunnel
- One way audio
Possible Fixes
- Reboot phone(s) Unplug phone cord and power supply if applicable. This is the cord that is plugged into the back of your phone into the INTERENT
- Check to see if you have Internet access. Bring up a web page on your computer. (Google, YouTube, etc.). If no internet, please call your internet provider.
- Reboot the modem of your internet provider (Spectrum, AT&T. etc.). Unplug the power cord for 30 seconds and plug back in.
- Call your Internet provider and make sure they have the SIP ALG and H225 protocols turned OFF.
- Replace phone cord to wall jack, handset and/or curly cord.
Programming Issues
- Phone is not ringing when/where it is supposed to
- Auto Attendant is not picking up when it is supposed to
Possible Fixes
- Check to see if your Do Not Disturb is turned OFF.
- Check to see if your volume button is turned all the way down (Off).
- Reboot phone(s) Unplug phone cord and power supply if applicable. This is the cord that is plugged into the back of your phone into the INTERENT
- Check to see if you have Internet access. Bring up a web page on your computer. (Google, YouTube, etc.). If no internet, please call your internet provider.
- Reboot the modem of your internet provider (Spectrum, AT&T. etc.). Unplug the power cord for 30 seconds and plug back in.
Network and IT Hardware Items/Providers
- Backend Phone Server-D&S Technologies custom private labeled provider. Located in secure datacenter in Philadelphia, PA
- Internet Provider-Spectrum, AT&T, Earthlink etc.
- Internet provider modem-Arris, Ubee, Motorola, etc.
- On premise Router/Firewall-Cisco, Sonicwall, Peplink, etc.
- On Premise computer switch-Cisco, Dell, Netgear, etc
- Data wiring/Patch panel/Jack
- Patch Cords
- VoIP Telephone-Yealink, Polycom, etc.
Possible Fixes
- First step is to always see if you have internet access. (See above)
- Run a speed test at speedtest.net if slow than call provider.
- Call your Internet provider and make sure they have the SIP ALG and H225 protocols turned OFF.
- Check your Router/Firewall settings-Basic VoIP Router requirements document on www.dstech1.com website
- Reboot phone(s) Unplug phone cord and power supply if applicable. This is the cord that is plugged into the back of your phone into the INTERNET
- Replace phone cord to wall jack, handset and/or curly cord.
These are the most common causes of issues with Hosted/Cloud base telephone systems. If you are unable to fix your issues, please call our office so that we may assist you in getting your business back working 100%
Questions D&S Technologies 262-789-1111
- Go to https://pbx.dstech1.com
- enter the login and password that was provided to you.
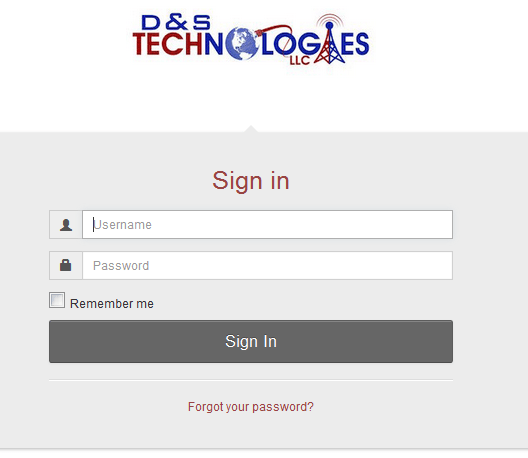
Go to https://pbx.dstech1.com
Login: (enter your login)
Password: (enter your password)
Along the top row choose Accounting

On the left choose Invoices

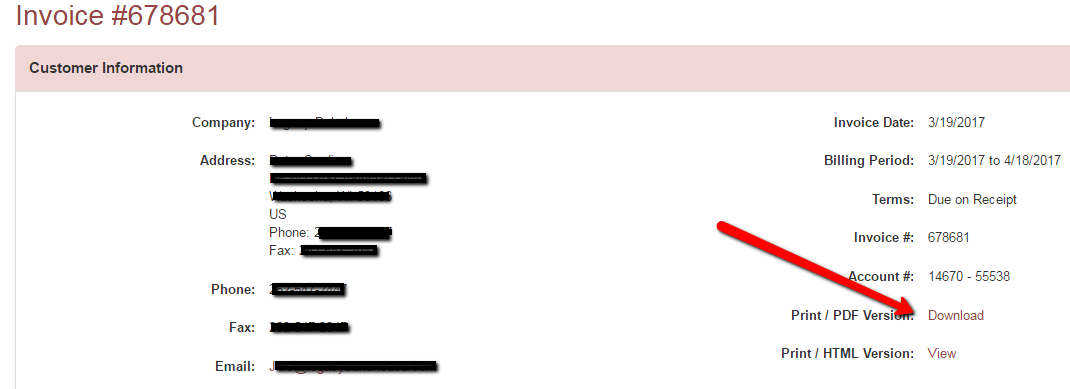
Choose which Invoice you want to download

Under customer information choose download on the right
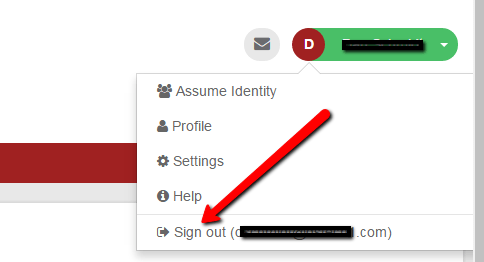
Logout of the admin portal in the upper right hand corner
Questions D&S Technologies 262-789-1111
1 Login to your hosted phone system at https://pbx.dstech1.com
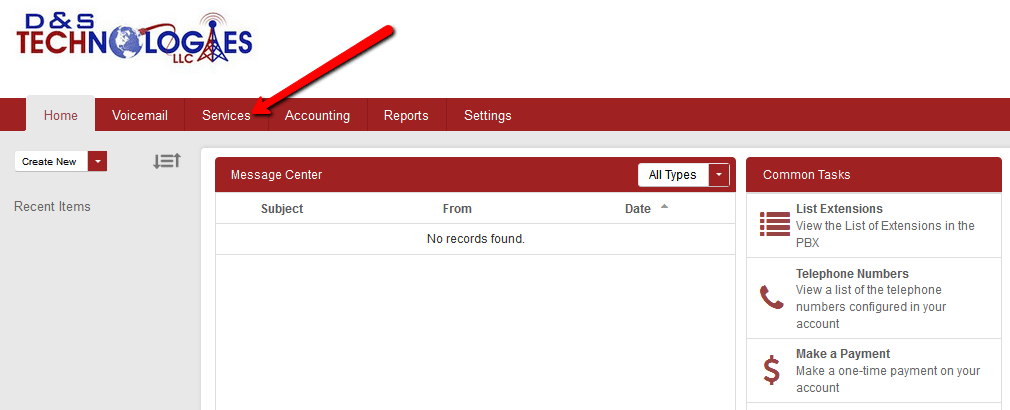
2 Click on Services
3 You need to change the name in 3 places:
Extensions
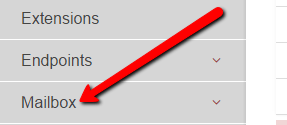
Endpoints
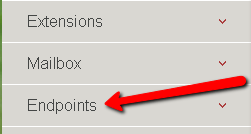
Mailbox
4 Once you change the name (In all 3 locations), click save
5 Logout of the admin portal in the upper right hand corner of the screen
6 You now must do a physical reboot of the phone (unplug the line cord and power cord(if applicable)) to have all changes applied.
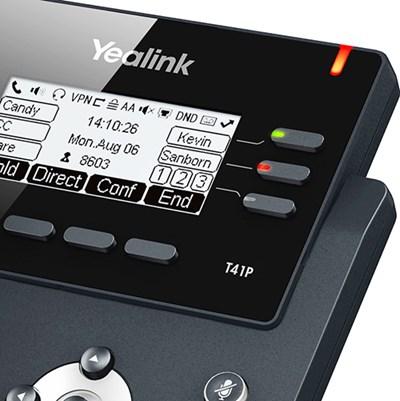
To setup a speed dial on your Yealink phone
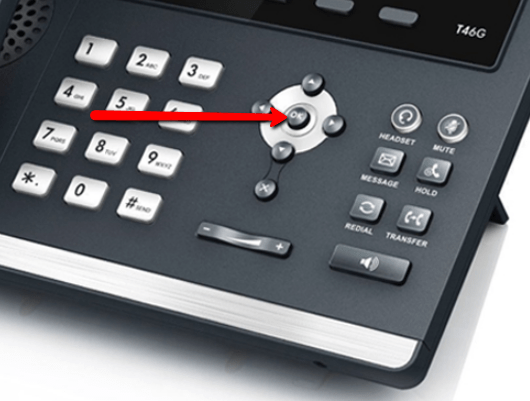
1 Press the OK button on your phone to get the IPv4 Address from the top of the display
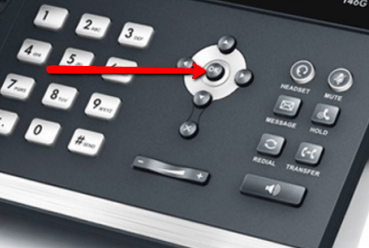
2) Type this IPv4 Address into your web browser(Internet Explorer, Firefox or Chrome)then enter
![]()
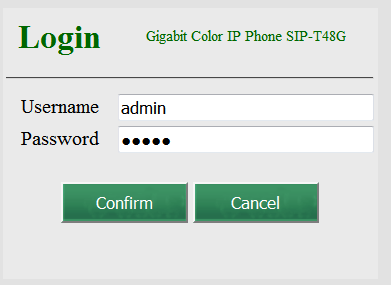
3 Login to the phone: Username =admin Password=(Your PBX password)
4 Choose the DSSKey tab along the top
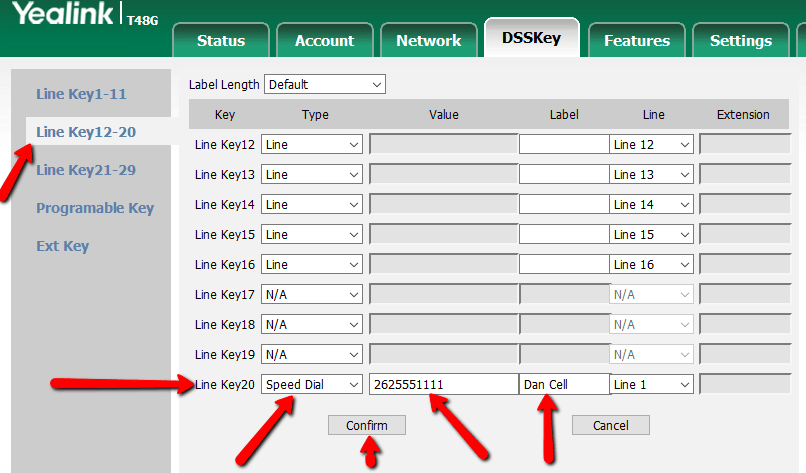
5 Choose which Line Key to put it on (Don’t replace Line Key 1 or 2 or any call park or BLF buttons already programmed)
6 Choose Speed Dial from the drop down list under Type
7 Enter the 10 digit outside number in the Value field. No need to add the 1
8 Enter a label that will show up on your phone
9 Click confirm and then logout.
1) Press the OK button on your phone to get the IPv4 Address from the top of the display
2) Type this IPv4 Address into your web browser(Internet Explorer, Firefox or Chrome)then enter
![]()
3) Login to the phone:
Username –admin
Password -(Your PBX password)
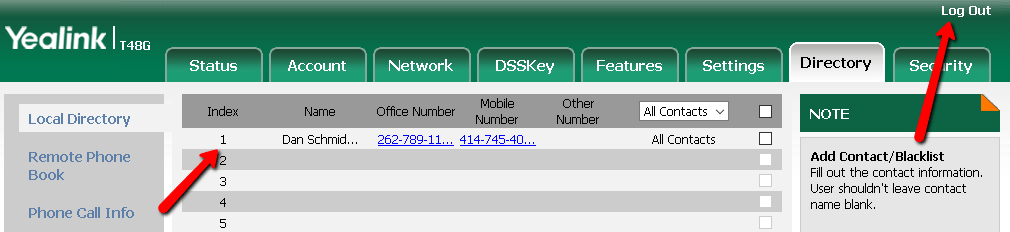
4) Choose the Directory tab along the top
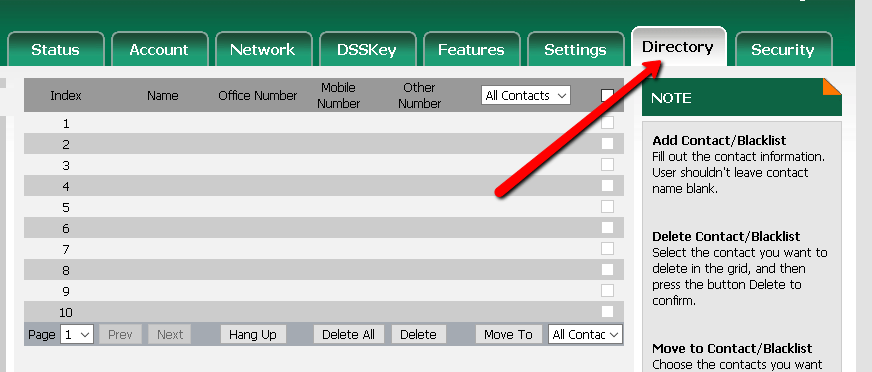
5) Choose the (1) Browse option to find your .csv file and then the (2) Import CSV option near bottom of page

Your csv file should be in the following format:
Full Name / Office Phone / Mobile Phone
6) Change the index from ignore to the corresponding title (1)– in this case Display Name, Office Number and Mobile number. Click on Import (2)

7) Your entries will be saved and you can now Log Out.
How to change an extension name on your Yealink phone
1) Press the OK button on your phone to get the IPv4 Address from the top of the display
2) Type this IPv4 Address into your web browser(Internet Explorer, Firefox or Chrome)then enter
![]()
3) Login to the phone:
Username –admin
Password -(Your PBX password)
4) Choose the DSSKey tab along the top

5) Set (1) to BLF and (2) to proper extension number and (3) is the name you want the label to show. (4) Hit Confirm to save it.
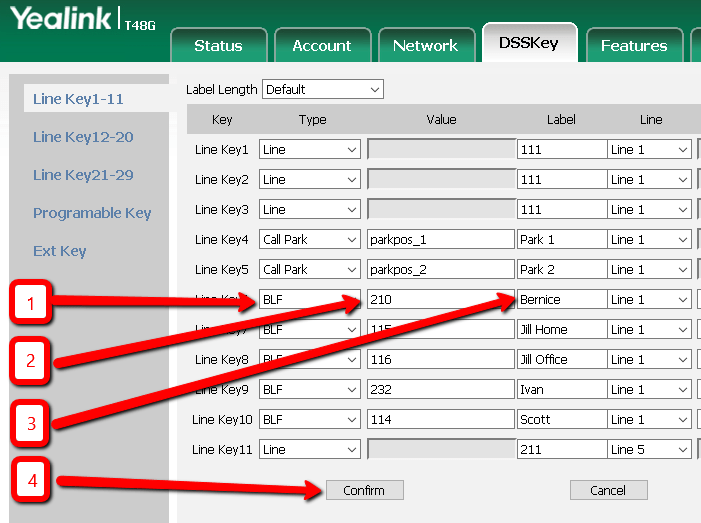
6) Your entries will be saved and you can now Log Out.

To setup call forwarding on your Yealink phone
1 Press the OK button on your phone to get the IPv4 Address from the top of the display
2 Type this IPv4 Address into your web browser(Internet Explorer, Firefox or Chrome)then enter
![]()
3 Login to the phone: Username admin
Password (your PBX password)
4 Choose the DSSKey tab along the top
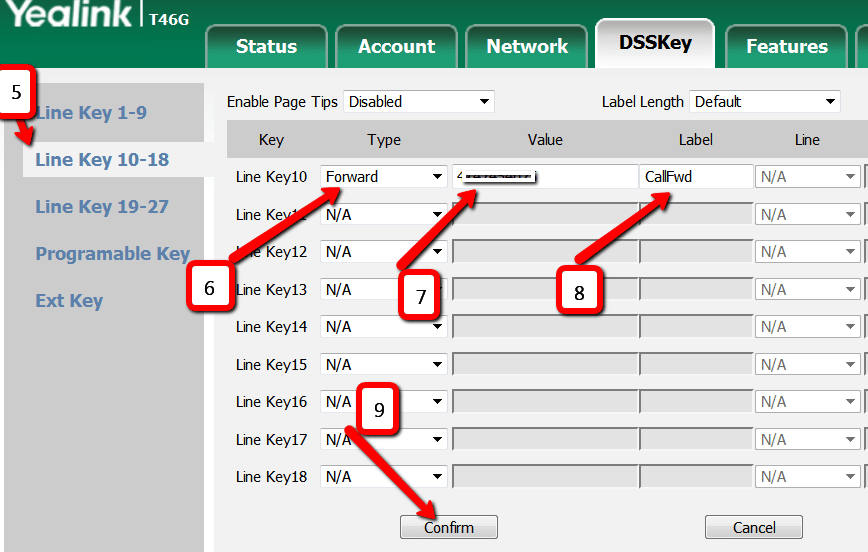
5 Choose which Line Key to put it on
6 Choose forward from the drop down list under Type
7 Enter the outside number in the Value field. No need to add the 1
8 Enter a label that will show up on your phone
9 Click confirm and then logout (upper right-hand of your screen).
To use this, simply toggle the button on (turns red) or off (turns green)
1 Login to your hosted phone system at https://pbx.dstech1.com
2 Click on Services
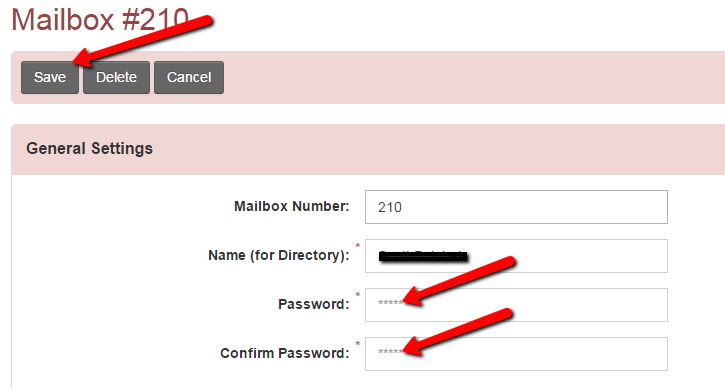
3 Choose Mailbox from the left side column
4 Choose which mailbox and click on the edit icon

5 Enter a new password, confirm it and then hit save.
6 Logout of the admin portal in the upper right hand corner of the screen
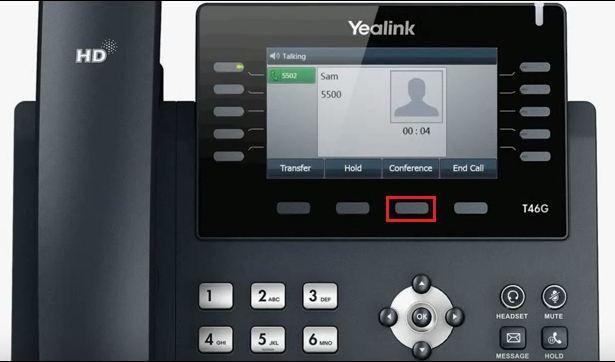
- While active on first call, touch the Conf softkey button at the bottom of your display.
- You will automatically get a dial tone to dial your second call
- Once the second call answers, hit the Conf softkey again and everybody will be joined
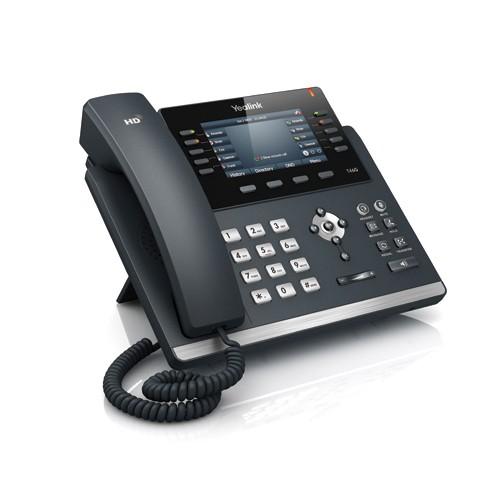
T46